Saturday, October 23, 2010

ServletException in BPELProcessManagerBean class for getDefaultRevision method and Work Around

I met below error

  1. javax.servlet.ServletException -
  2. com.collaxa.cube.ejb.impl.BPELProcessManagerBean.
  3. getDefaultRevision
while upgrading my SOA server 10.1.3.4 to 10.1.3.4MLR by applying the patch 7586063.While log in to my BPEL console I got below error screen

image

while looking to the log file(%ORACLE_HOME%/opmn/logs/default_group~oc4j_soa~default_group~1.log) I figured out the method named getDefaultRevision() is missed or some problem occurs in that.

  1. <2010-10-23 11:12:25,781> <FATAL> <default.collaxa.cube.activation> <AdapterFramework::Inbound>
  2. java.lang.NoSuchMethodException:
  3. com.collaxa.cube.ejb.impl.BPELProcessManagerBean.getDefaultRevision(com.oracle.bpel.client.BPELProcessId,
  4. com.oracle.bpel.client.auth.DomainAuth)
        at
  5. com.oracle.bpel.client.util.ExceptionUtils.handleServerException(ExceptionUtils.java:91)
        at
  6. com.oracle.bpel.client.BPELProcessHandle.getDescriptor(BPELProcessHandle.java:208)
        at
  7. oracle.tip.adapter.fw.jca.AdapterFrameworkListenerImpl.onInit(AdapterFrameworkListenerImpl.java:160)
       
  8. at oracle.tip.adapter.fw.agent.jca.JCAActivationAgent.setupEndpoint(JCAActivationAgent.java:1041)
        at
  9. oracle.tip.adapter.fw.agent.jca.JCAActivationAgent.initiateInboundJcaEndpoint(JCAActivationAgent.java:941)

While investigating I came across few brainstorming facts.

  1. This error comes while loading all domains,more preciously after loading all Processes.
  2. Activation Agent is throwing error and the dependent classes too.

As BPEL Console shows error in com.collaxa.cube.ejb.impl.BpelProcessManagerBean it comes to my mind about ejb-ob-engine.jar and we can find the jar file in %SOA_HOME%\j2ee\<AS_Instance>\applications\orabpel but after applying the patch upgraded jar file got created in %SOA_HOME%\bpel\system\j2ee\ejb directory with oc4j as suffix in file name and old ejb-ob-engine.jar should be replaced by the new jar file. But it may not happen while applying the patch.

As a workaround

I have stopped Oracle SOA server first using opmnctl stopall and then I have copied  'ejb_ob_engine_oc4j.jar' file from
%SOA_HOME%\bpel\system\j2ee\ejb\ejb_ob_engine_oc4j.jar to %SOA_HOME%\j2ee\<AS_Instance>\applications\orabpel and renamed it to ‘ejb_ob_engine.jar’.

image

I have restarted the server using opmnctl startall and BPEL Console works like a charm.

image

Monday, October 18, 2010

Working with ADF Choice Elements

Asking user to enter data based on ADF choice element is not a tricky one

where as capturing the data selected by user and use it to fulfill other purpose is really a tricky task. We can drag an exposed view object from Data control and drop it in our webpage then automatically we will be asked for the “Selection Type”. After Selecting a type it will create underlying iterator and Bindings and the page got displayed with proper selection types.But if user wants to display some other details based upon selected data then how we can use this selected data.

In this post I am trying to implement how entered data using choice element
got captured in backing bean.

Single Selection Choice Elements:

image

Figure 1

As above figure shows three types of single choice element is available in ADF and they are “select one list box”(refer figure 2),“select one choice” (refer figure 3) and “select one radio”(refer figure 4)

image  Figure 2

imageFigure 3 image Figure 4

I have used command link and as user clicks on it, backing bean method get invoked and selected data is shown as output. To achieve that we need to follow below steps.

  1. Define the action listener for command link where user needs to click to
    view the output

    <af:commandLink text="view Output"id="cmdlnk2" actionListener="#{viewScope.TestADFBean.viewOPSelOneLB}"/>

    Bind the element for showing output as a backing bean property using binding
    attribute

    <af:inputText value="" binding="#{viewScope.TestADFBean.outputBinding1}"label="Select Country"id="it1"></af:inputText>


  2. Backing bean procedure is as follows

    1. public void viewOPSelOneLB( ActionEvent actionEvent) { //Get the specific binding Container
    2. BindingContainer bindings = BindingContext . getCurrent (). getCurrentBindingsEntry (); //Get the sepecific list binding using the binding name passed as argument to the get method of binding container
    3. JUCtrlListBinding listBinding = ( JUCtrlListBinding )bindings. get ("CountryEntityObjectView11"); //Get selected value
    4. Object sel = listBinding. getSelectedValue ();
    5. System.out. println (sel);
    6. outputBinding1. setVisible (true); //Set selected value to already binded property
    7. outputBinding1. setValue ("Output From SelectOneListBox [" + sel + "]");
    8. }

Multiple Selection Choice Elements:

image

Figure 5

As above picture depicts ADF Multiple selection consists of “Select Many Choice” (refer to Figure 7), “Select Many Shuttle”(refer to Figure 6),”Select Many List Box”(refer to Figure2),Select Many Check Box is same as “Select One Radio” as shown in Figure 4 but the difference is Check Box(please refer the drop down element of Figure 7) occurs instead of Radio button and user can select more
than one value which is not possible in Radio button.
image image
Figure6 Select Many Shuttle                                        Figure 7 ADF select Many Choice

For displaying data selected by user using multiple choice selection is exactly same except the backing bean method(Step 1 and Step 2 is same as above).

Backing bean method is as follows.

  1. public void SelectInputLsnrForShuttle( ActionEvent actionEvent) { //Get Binding Conatiner
  2. BindingContainer bindings = BindingContext . getCurrent (). getCurrentBindingsEntry (); //Get the sepecific list binding
  3. JUCtrlListBinding listBinding = ( JUCtrlListBinding )bindings. get ("CountryEntityObjView_LOV1"); //Get all Selected Values
  4. Object[] str = ( Object[] )listBinding. getSelectedValues ();
  5. StringBuffer buf = new StringBuffer (); //Append all Selected objects to a buffer
  6. for ( int i =0;i<str. length ();i++){
  7. buf. append (" ");
  8. buf. append (str[i]);
  9. buf. append (" ");
  10. System.out. println (buf. toString() );
  11. }
  12. opBindingForShuttle. setVisible (true); //Set selected value
  13. opBindingForShuttle. setValue (buf. toString() );
  14. }

Wednesday, October 13, 2010

Customizing ExecuteWithParams : Executing a view Runtime Based on User Input

Step1: Create a view with input parameter based on which the query needs to be fired


Step2: Implement the view implementation class and wrap it with an application module


Step3:
Crate a custom method in Application Module Implementation class for executing the view object.


Step 4: Create a client interface for that Implementation class and make sure that the newly created custom method is included.

Step 5: Make sure that the custom method is exposed in Data Control.


Step 6: Create a method binding in Page definition xml file.


Step 7: Create an Input box in your webpage and bind that one with Managed Bean.

Step 8: Create a button and set Action listener on that to execute the custom method.


Action Listener is defined as

Step 9: Create a dynamic table which used as a container for output

Step 10: view Output

Thursday, October 7, 2010

autoSuggestBehavior using Database Query

autoSuggestBehavior is new addition in oracle ADF 11g used to display suggestedItems in a drop down box for an editable component in webpage based on user input on that. In this post what I am trying to show is an implementation of autoSuggestBehavior. Weblog for the AMIS Technology corner has a very good post for that. I am trying to leverage database persistence with autoSuggestBehavior. Data which is displayed as suggestedItems can be taken from backing bean (we can refer (http://technology.amis.nl/blog/6581/adf-11g-the-native-autosuggest-behavior for that methodology) or we can use data from database tables. In this post I have implemented that.

Below is the output of that implementation.


I have created a SQL script for creating country table and inserting values to that table. Please refer http://www.box.net/shared/g6hm06lbvd for downloading that script.

To achieve this only unlike other ADF projects we need not to create any Entity object, view object, Application Module. We can directly start working on webpage. As discussed earlier autosuggestBehavior shows suggestedItems for editable component in webpage. So we have used an inputText and attach viewscope managed bean procedure to the suggestedItems.


The Procedure is as follows


Used getCountries () procedure is as follows


I have used JDBC connection from managed bean to retrieve all country details. Below procedure is used for that.


Above method shows the Implementation without using any ADF Components like Entity, View, and ApplicationModule. But we can achieve same using a view object named "CountryEntityObjectView" and expose that view in Application Module. So that It will reflect in data control.


After that we need to create an Iterator in Page Definition file like below


Make sure that Its Range Size is Sufficient enough to capture all country names. We need to use this Iterator in our Managed Bean Procedure for suggestedItems (showed in 3rd Screen Shot here) as below


download link for Managed Bean java code is http://www.box.net/shared/or2olv7ftz , for webpage is http://www.box.net/shared/g71rrk6lc2and for page definition file is http://www.box.net/shared/zmpt2fh0ms/

Thursday, September 23, 2010

ADF Coding Standard Document Template

I have created an ADF coding standard document template,please refer below URL for that. Hope it will help and please give your feedback about that.

http://www.box.net/shared/na4o2rvtdm

Friday, August 27, 2010

Bounded Task Flow In Popup and Resetting Field data in Popup using popupFetchListener

In my older post (Insert Into Multiple Tables using Bounded TaskFlow in ADF ) the use case I had shown is having a drawback like data from table got automatically populated (as Shown Below) as user navigates to the bounded taskflow region from main page for creating a new Employee. In this blog I am trying to make some modification in my ViewController project so that the issue got resolved.


Step1: Create a Bounded task flow and make sure that 'Create Train' is selected.


Step 2: Drag View from Component palate and rename it likes below. Please follow my previous post (Insert Into Multiple Tables using Bounded TaskFlow in ADF and refer Figure 2 to Figure 6 ) to create those pages. Make sure those page extension should be *.jsff instead of *.jspx.

Add train Button and Train Button Bar for all pages in Task Flow like below


After completing all jsff pages bounded task flow will look like below.


Add valid name for all View id in Task Flow document source (task-flow-definition.xml)


Step 3: Modify Employee.jspx page

In my previous post (Insert Into Multiple Tables using Bounded TaskFlow in ADF) we have used Command Links for creating Employees Please refer to Figure 1 for this post. Now we can make it more fancy by using images and user can click on it to navigate to taskflows.

I have used images like for 
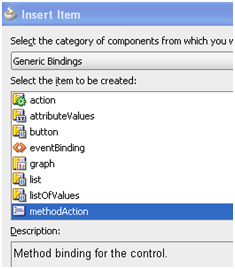
(AddProfile.PNG) Adding Employee, for searching Employee, for editing Employee


We can use popupFetchListener and attach it to our managed Bean using a method so that the method will execute at the time the popup rendered


  1. public void fetchPopupListener( PopupFetchEvent popupFetchEvent) {
  2. System.out. println ("In Fetch PopUP Listener"); //Create Insert For Baisc Info
  3. BindingContainer bindingsbasic = BindingContext . getCurrent() . getCurrentBindingsEntry() ;
  4. OperationBinding operationBindingbasic = bindingsbasic. getOperationBinding ("CreateInsertBasic");
  5. Object resultbasic = operationBindingbasic. execute() ; //Create Insert For Contact Info
  6. BindingContainer bindingscontact = BindingContext . getCurrent() . getCurrentBindingsEntry() ;
  7. OperationBinding operationBindingcontact = bindingscontact. getOperationBinding ("CreateInsertContact");
  8. Object resultcontact = operationBindingcontact. execute() ; //Create Insert For Master Info
  9. BindingContainer bindingsmaster = BindingContext . getCurrent() . getCurrentBindingsEntry() ;
  10. OperationBinding operationBindingmaster = bindingsmaster. getOperationBinding ("CreateInsertMaster");
  11. Object resultmaster = operationBindingmaster. execute() ; //Create Insert For Baisc Info
  12. BindingContainer bindingsedu = BindingContext . getCurrent() . getCurrentBindingsEntry() ;
  13. OperationBinding operationBindingedu = bindingsedu. getOperationBinding ("CreateInsertEducation");
  14. Object resultedu = operationBindingedu. execute() ; //Create Insert For Job Info
  15. BindingContainer bindingsjob = BindingContext . getCurrent() . getCurrentBindingsEntry() ;
  16. OperationBinding operationBindingjob = bindingsjob. getOperationBinding ("CreateInsertJob");
  17. Object resultjob = operationBindingjob. execute() ;
  18. }

But Make sure that you are having below bindings created in


Drag newly created task-flow-definition to the dialog and it will display the dialog below


We can test the page and it comes like this

Sunday, August 15, 2010

ADF tree navigation to third level and Workaround for “ADF Tree Not Inside Container”

Step 1: Create view object based on Product table. Structure of this table is shown in Figure 1.


Figure: 1

Create view object "CategoryViewObj" based upon below query on above product table.


Figure: 2

Create view object "ProducerViewObj" based upon below query on above product table.


Figure: 3

Create view object "ProductViewObj" based upon below query on above product table.


Figure: 4

Step 2: Create view link between CategoryViewObj and ProducerViewObj using CategoryId and ProducerViewObj and ProductViewObj using ProducerCode


Figure: 5


Figure: 6

Step 3: Wrap all ViewObjects and ViewLinks in application module like below.

Drag "CategoryViewObj" under ProductAppModule and named it CategoryViewInstance. Drag the viewlink immediate below it and put it under CategoryViewInstance and renamed it to "ProducerInstance" and drag the view link immediate below of "ProducerViewObj" and put it under "ProducerInstance".


Figure: 7

Step 4: Create ADF tree table by dragging "CategoryViewInstance" from data control palate and add its two level of children by clicking green add button adjacent to it. We can select our own display attributes for each level like below.


Figure: 8


Figure: 9


Figure: 10

Modify nodestamp facet under ADF treetable component like below.


Figure: 11

Add columns like below


Figure: 12

While testing the page we face this error.


<RegistrationConfigurator><handleError> Server Exception during PPR, #1
java.lang.IllegalStateException: ADFv: Not inside a container.
at oracle.adfinternal.view.faces.model.binding.FacesCtrlHierBinding$FacesModel.exitContainer(FacesCtrlHierBinding.java:672) at oracle.adfinternal.view.faces.model.FlattenedTreeCollectionModel.getRowIndex(FlattenedTreeCollectionModel.java:109)
at oracle.adfinternal.view.faces.renderkit.rich.TreeRendererUtils$1.getRowIndex(TreeRendererUtils.java:552)
at oracle.adfinternal.view.faces.renderkit.rich.TreeTableRenderer.handleExpand(TreeTableRenderer.java:520)


This will come because we did not set any key attribute in our view objects and ADF tree table is not able to find row index. So we need to set key attributes to our view objects like below.


Figure: 13


Figure: 14


Figure: 15

While testing we get our desired output.